EECG Working from Home
This guide will provide instructions to set up either JetBrains Projector or Visual Studio Code's SSH extension to help you do the labs from home more efficiently. By setting up either one of those, you can write code as if you were coding directly on the remote lab machines.
- Compatible Client OS: macOS, Windows, and Linux
- Target: EECG UG Lab Computers or any other SSH-compatible Unix-like hosts
- Recommended Setup Time: 15 minutes for Projector; 10 minutes for VS Code. Actual time varies depending on your network connection or the EECG UG host's load/speed.
You will want to begin by selecting a 2-digit or 3-digit lucky number from 51-100, 130-180, or 201-249. In the commands below, replace XXX with that lucky number, as I recommend configuring all settings below on the same host machine.
JetBrains Projector
Prerequisite: a valid JetBrains Free Education License
Install JetBrains projector-installer on the EECG Host
- Connect to the selected EECG UG host using an SSH client. e.g. iCtrl's Terminal, PuTTY or OpenSSH.
- At the time of writing, each student is assigned a 2048MB quota. Before proceeding to installation, you will want to make sure you have enough disk quota by issuing
quota -son the EECG host. For example, a complete CLion installation takes about 1200MB of space, and you will want to see the current utilized space below 2048 – 1200 = 848 MB. If you are running out of space, use thedu -ah | sort -hcommand or File Cleaner in iCtrl's File Manager to identify and delete unused files. - Install JetBrains'
projector-installerscript on the EECG host.
# install the projector-installer script
pip3 install projector-installer --user
- To easily run
projector-installerwithout entering its full path, you will want to include its location in your terminal shell's $PATH variable.
nano ~/.cshrc # or ~/.tcshrc depending on your shell
Navigate to the bottom of the file and add the line below. If the file contains a comment directing you to modify $PATH elsewhere, follow those instructions instead.
set path = ($path ~/.local/bin)
- Now log out and log back in. Depending on how you connected to the EECG host, this means you might want to close the SSH terminal window, and if you are using a VNC connection, you will have to terminate the VNC session before continuing. e.g. If you are using iCtrl's VNC Viewer, you will want to select "Reset VNC" from the Advanced Menu at the bottom right corner of the window.
Install IDE
- Now you should be able to run
projectorin the remote host's terminal without a problem. Note that you will want to override the "cache directory" to use/tmpas your user directory will not have enough quota for the installation to be completed. Therefore, the command should be:
# if you are seeing "command not found",
#  revisit the last section or post a comment at the bottom of this page
projector --cache-directory=/tmp
- If an agreement shows up, you will want to navigate to the bottom using your mouse's scroll wheel or your keyboard's ↓ key and select yes.
- Depending on what language you will be working with, select the IDE you need. For example:
- APS105, ECE244, ECE297, ECE344: CLion
- APS106, ECE326: PyCharm Professional
- Select "No" when you are asked whether you want to use Projector-tested IDE only, so that you will be able to see the latest IDE version in the coming list.
- Select the version you want to install. If you have no preference, I recommend always using the latest version.
The installation should now run and a Projector server instance will be launched if the installation is successful. Now you can do an SSH port-forward between your machine and the remote target and access the IDE in a browser on your machine. If you don't know what this is all about or simply don't want the hassle of setting up forward channels, you can Run the IDE without Projector.
Run the IDE without Projector
The following steps will help you to locate the IDE installation and create a Desktop Entry shortcut so you will be able to launch the IDE with a single click in the future.
- In a graphical environment (VNC or physical machine) of any EECG UG machine, open a terminal and run the following depending on your IDE of choice:
# The following path might be different if you selected a different version to install

# CLion
~/.projector/apps/clion-2022.2.1/bin/clion.sh

# PyCharm
~/.projector/apps/pycharm-2022.2.1/bin/pycharm.sh
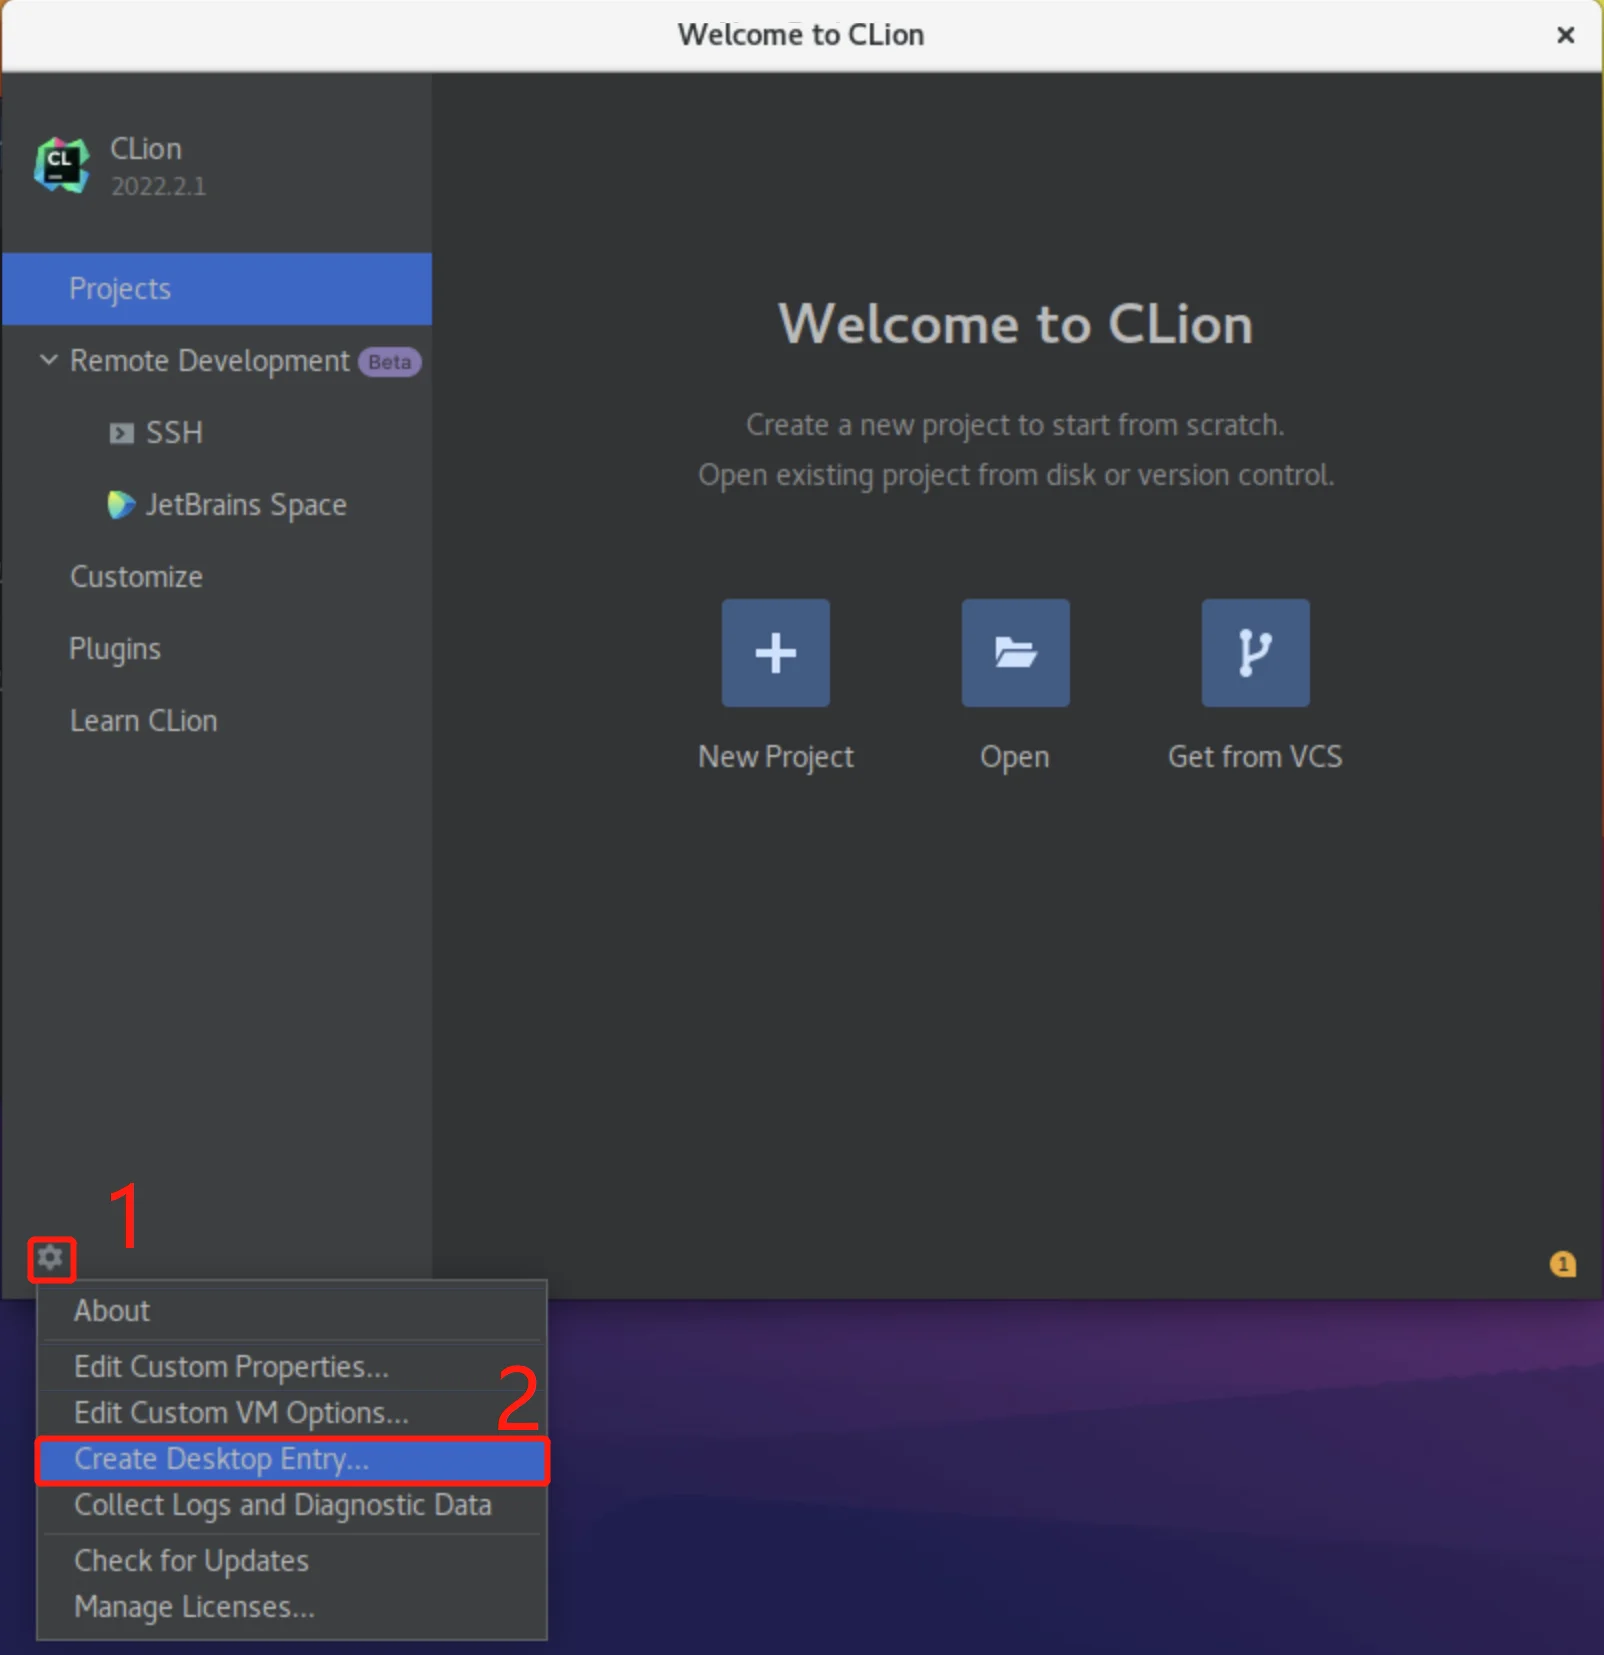
- Accept the agreement and activate your JetBrains license if you are prompted to do so.
- In the "Welcome to CLion" window, click the "gear" button in the bottom left and select "Create Desktop Entry". Click "OK" to proceed.
- Now you should be able to find CLion in the "Application -> Programming" Menu of the taskbar. If not, log out and log back in and you should be able to see it. You can right click on it to create a shortcut on the taskbar or on the desktop.
VS Code
(Optional) SSH Auto-Login
This section only explains how to set up automatic SSH login on Mac and Linux. If you are lucky enough to have recent versions of Windows installed, the instructions will work for you as well.
Now you might get disturbed by password prompts, but you can create a security key on your computer, so the remote machine recognizes you every time you log in. However, please note that you should only do the following on your own computer!!
Please do not proceed if you do not understand the risk!
-
Open your computer's Terminal App
-
Create a security key on your computer
# keep hitting "return" on your keyboard to use default settings
ssh-keygen -t rsa
-
By hitting "return" on your keyboard a few more times, make sure you have completed the security key generation with default settings.
-
Copy and modify the necessary fields ("username" and "machine host number XXX") in the command below, then paste it into the terminal again
cat ~/.ssh/id_rsa.pub | ssh userName@ug251.eecg.toronto.edu "mkdir -p ~/.ssh && chmod 700 ~/.ssh && cat >> ~/.ssh/authorized_keys"
# enter your password when prompted
- Now you should be able to automatically log in via SSH, without having to enter your password every time.
Install Visual Studio Code
Download Visual Studio Code (Insider version is not recommended as bugs are commonly present in those versions): https://code.visualstudio.com
Install extension "Remote - SSH"
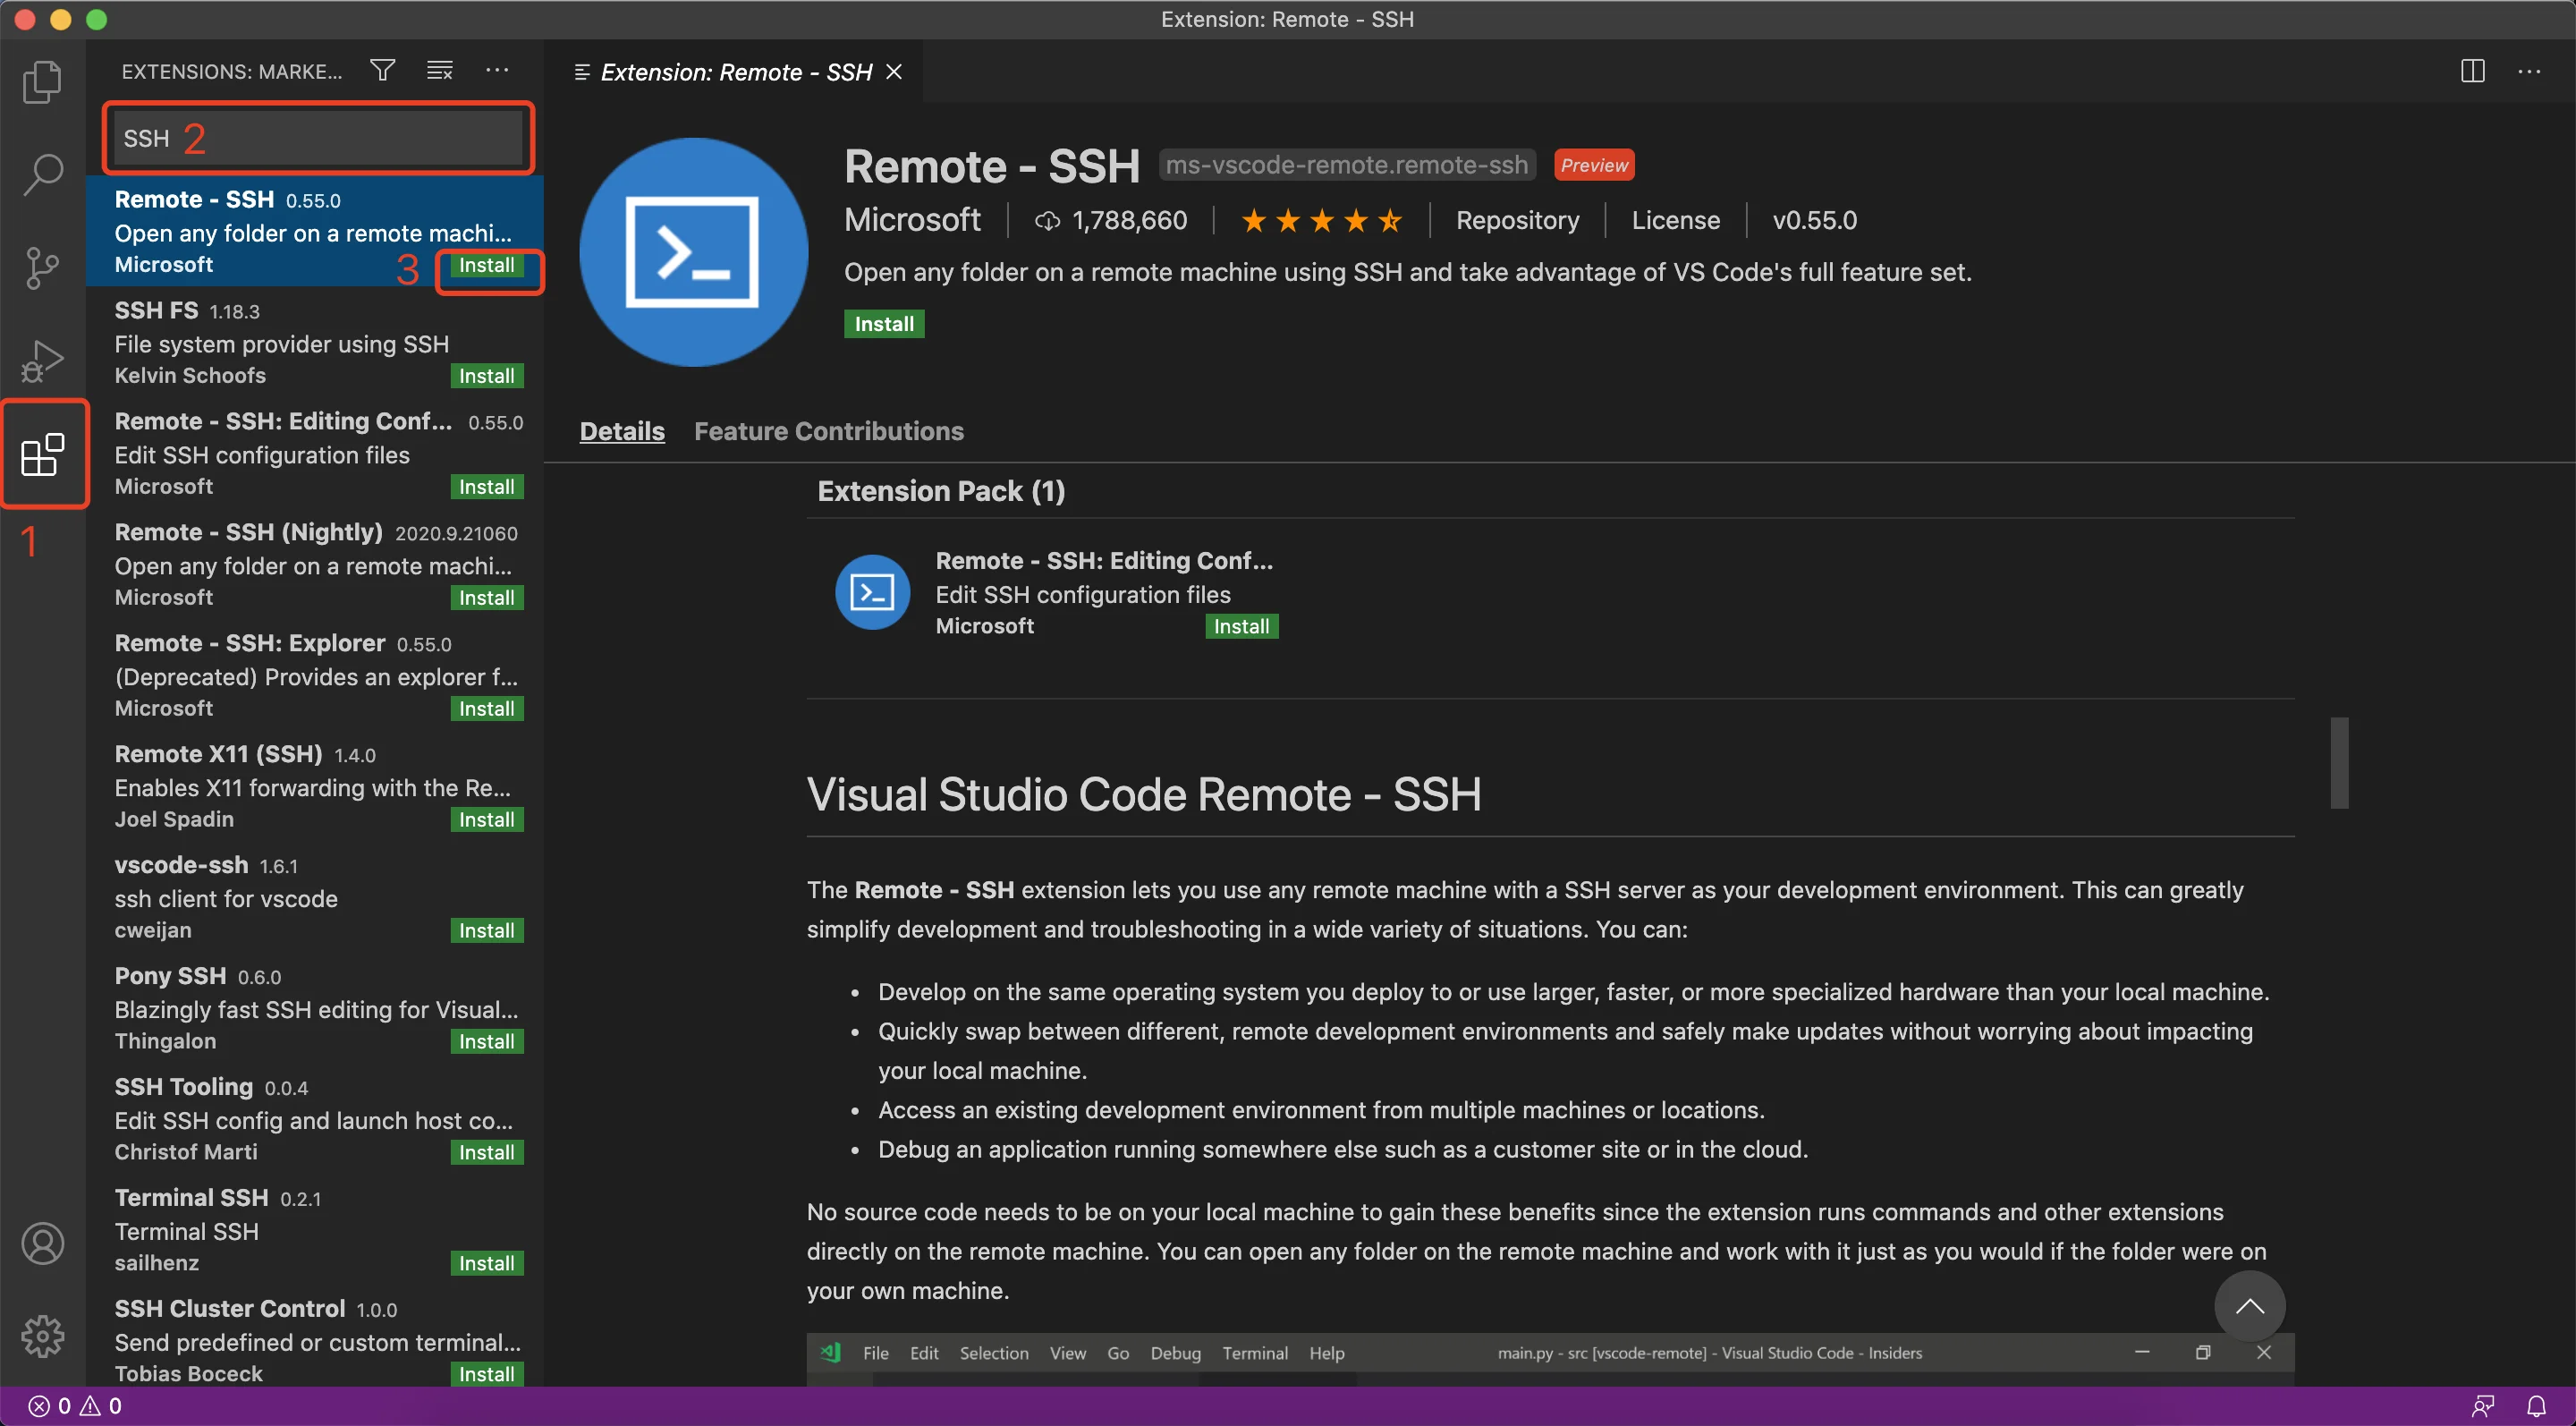
- Launch VSCode and click on the Extensions tab in the leftmost toolbar. Search for "SSH", and install extension "Remote-SSH".
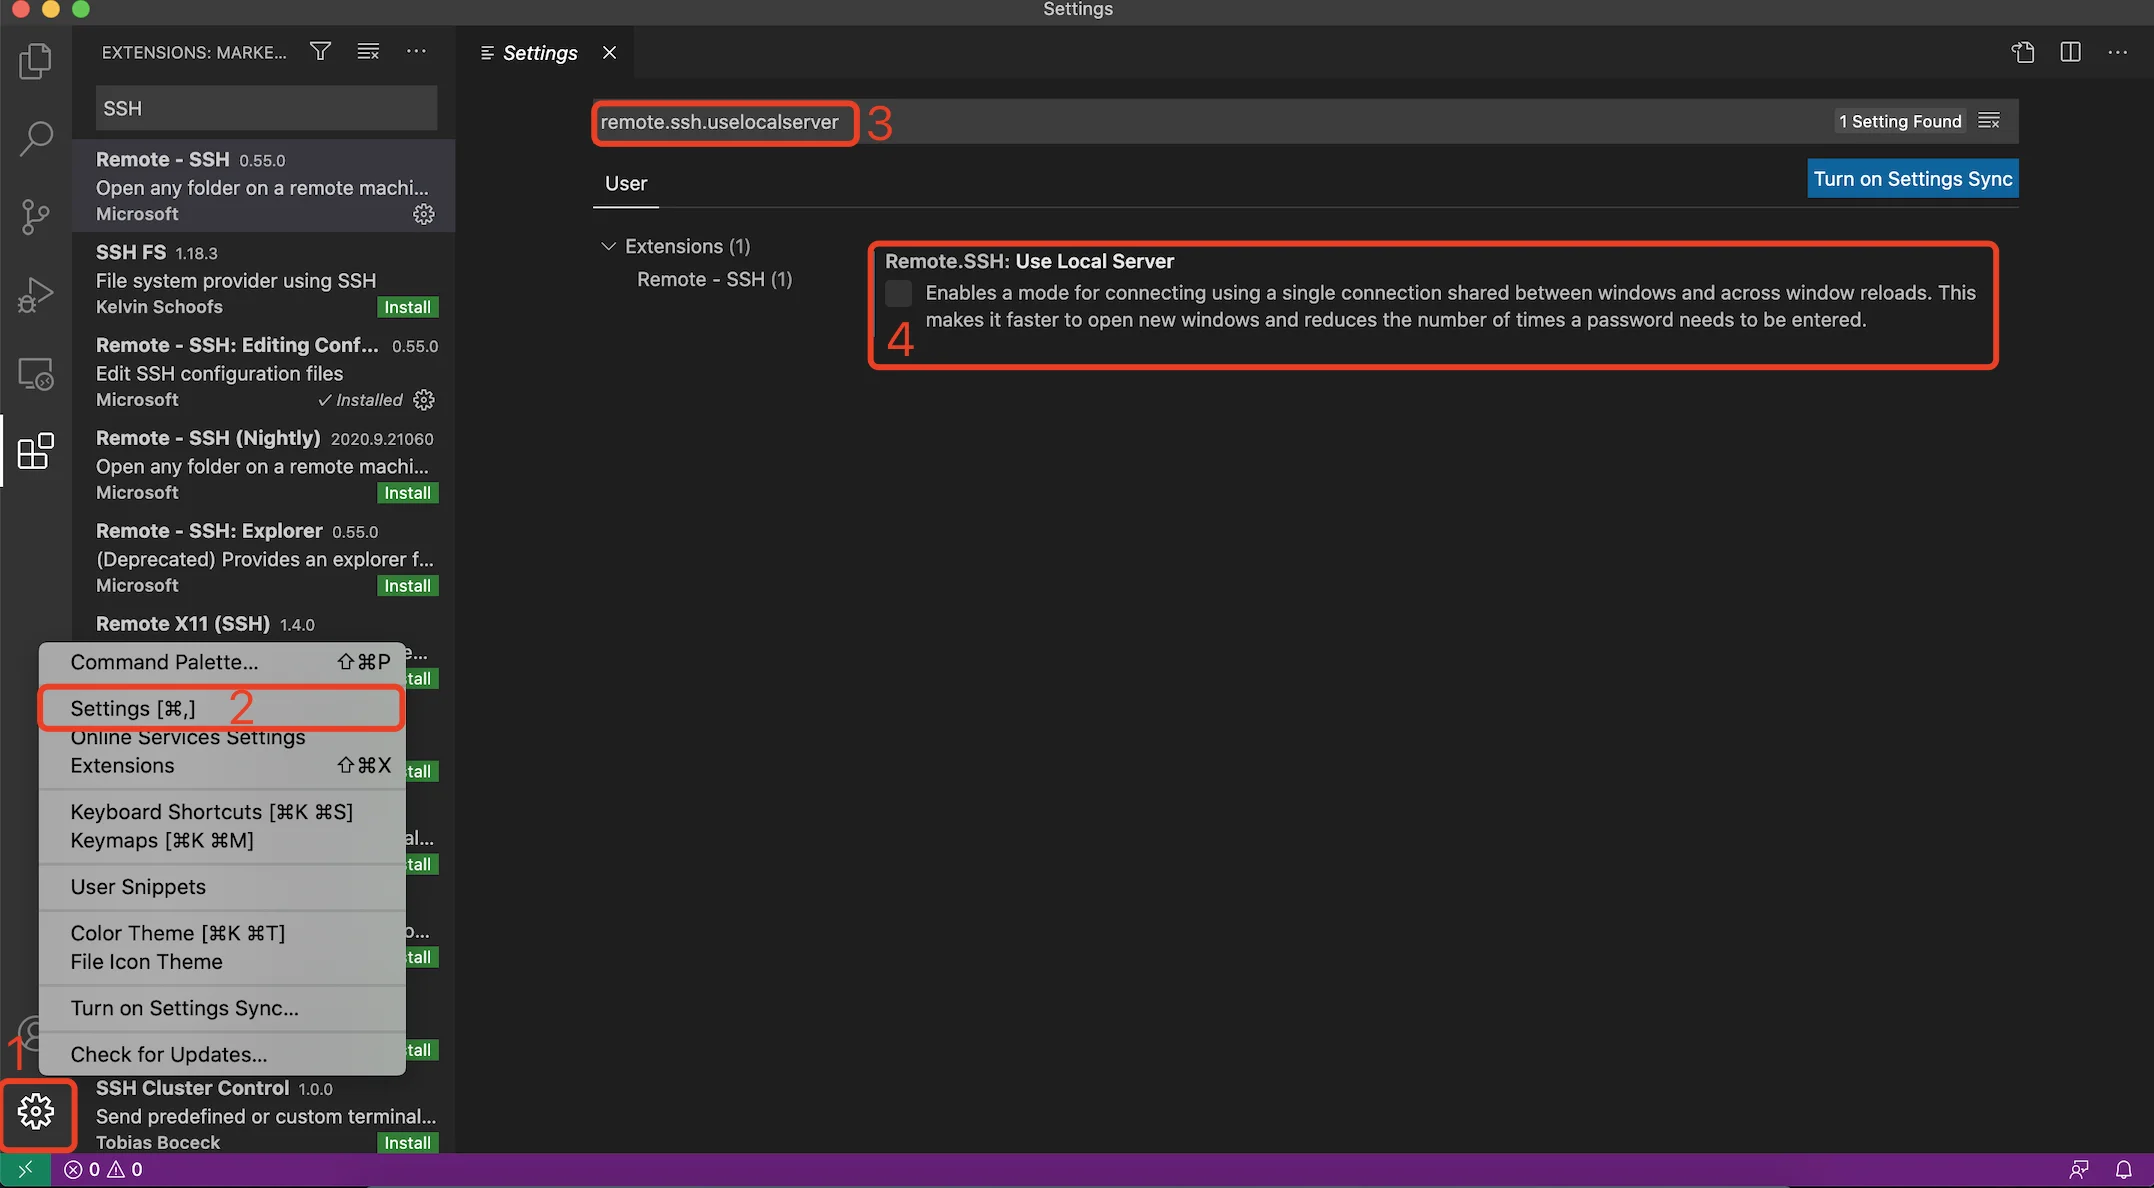
- (You don't need to do this step on Windows) To mitigate some bug in the latest version of the "Remote-SSH" extension, we need to disable feature "Use Local Server". Open settings and search for "remote.ssh.uselocalserver". Then disable it.
Add New SSH Host
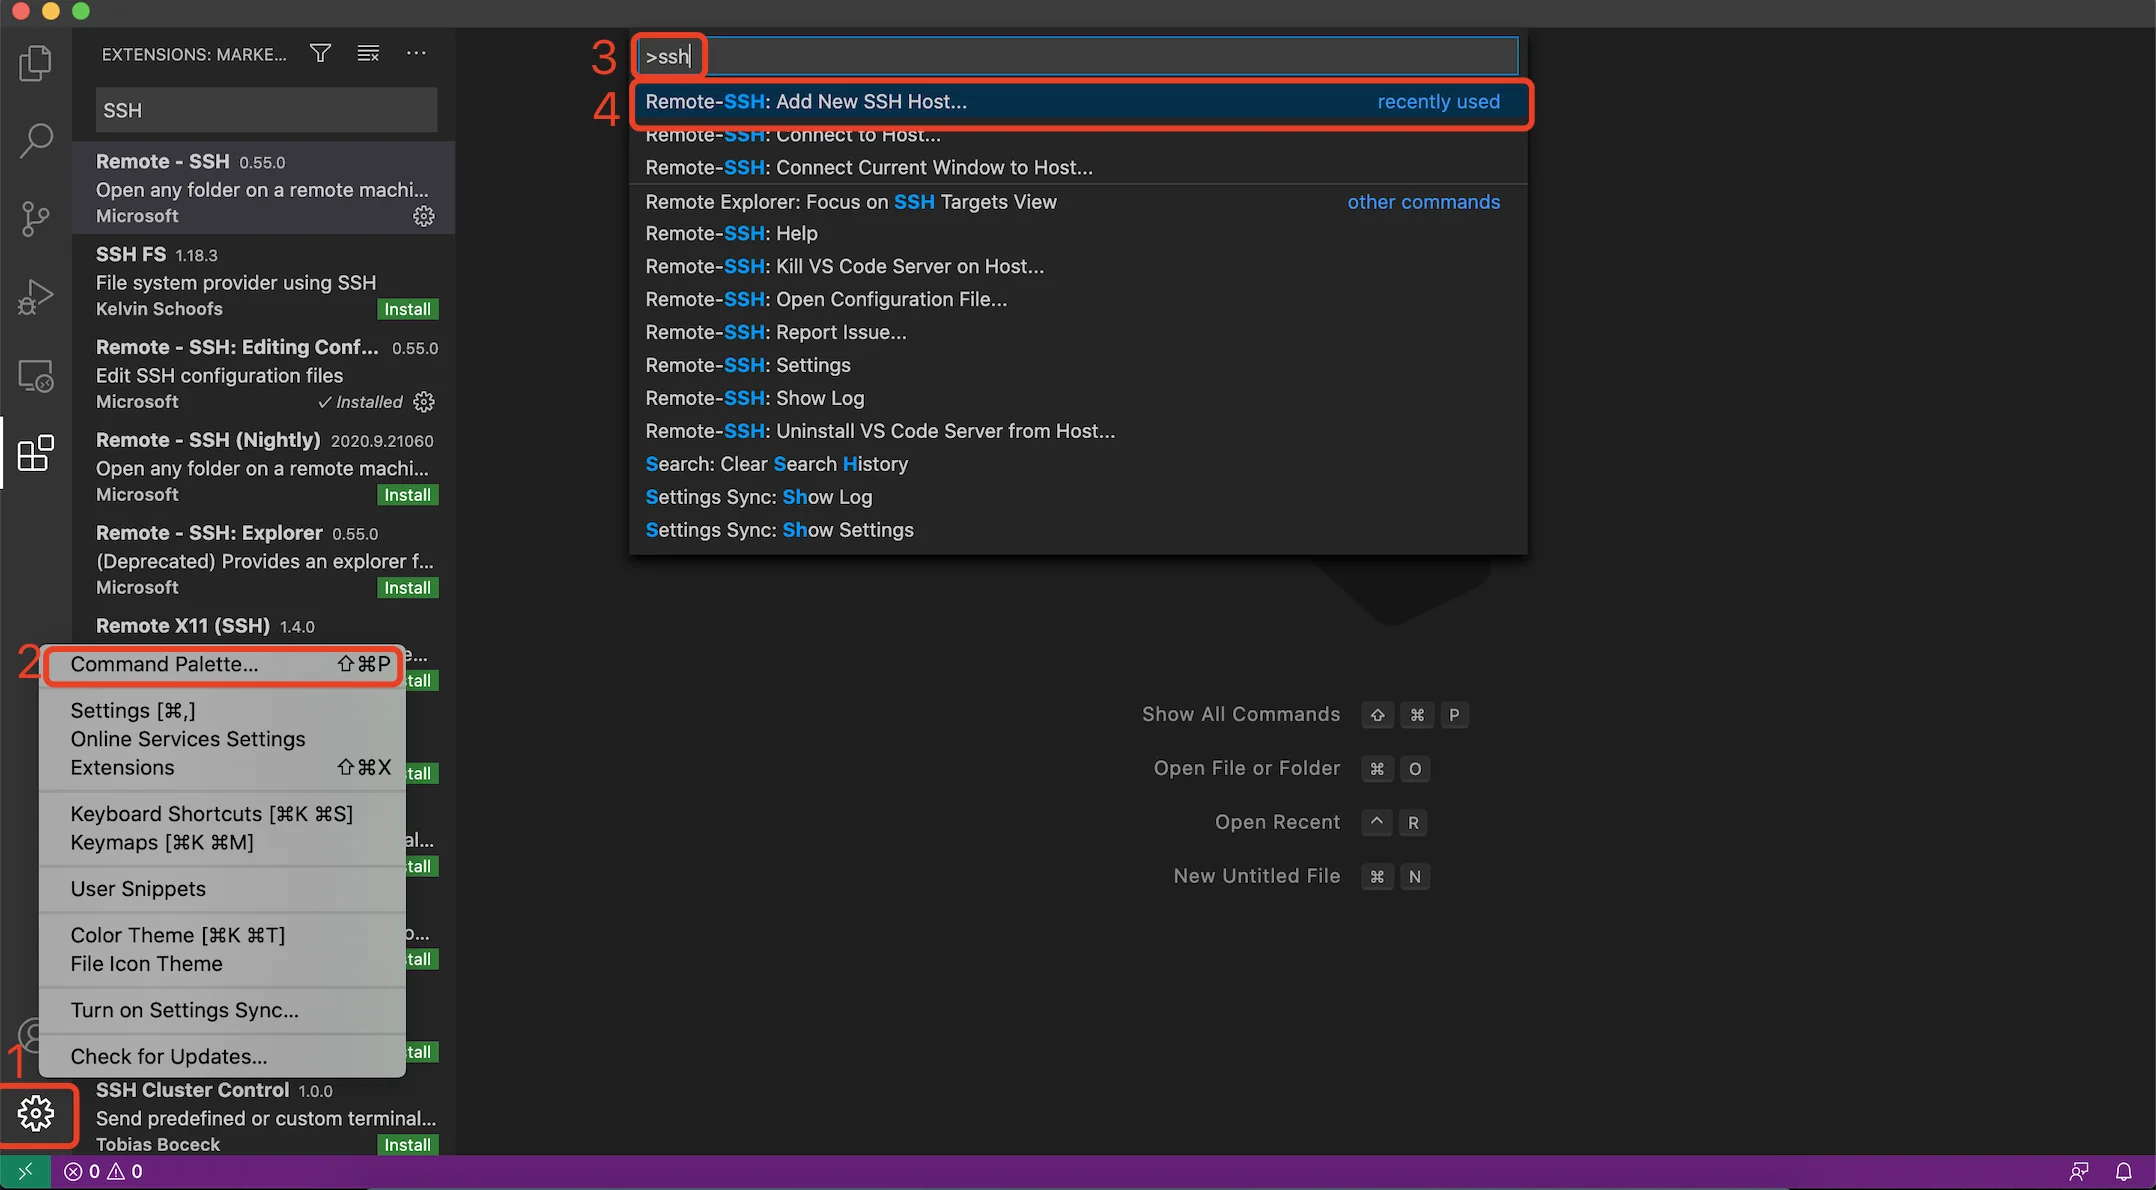
- Launch Command Palette by either clicking the gear button at the bottom left, or using keyboard shortcut "Shift+Command+P". Search for "SSH" and select "Remote-SSH: Add New SSH Host..."
- Copy the below command and modify the necessary fields, then paste it into the "Enter SSH Connection Command" Prompt.
ssh ugUserName@ugXXX.eecg.toronto.edu

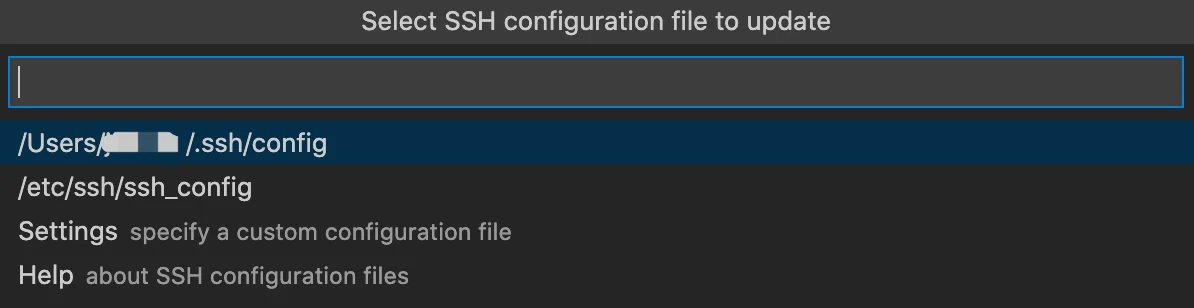
- The next prompt asks where you want to store this SSH host. I recommend storing it in your user directory, which is the first option.
Connect to Remote Host and Start Working
- Search for "SSH" again in the Command Palette. This time we click on "Remote-SSH: Connect to Host...".
- Select the host we just added and a new window should pop up.
- Enter your EECG UG remote password if prompted and wait for the installation to finish. The installation usually takes less than 1 minute.
- Click on the Explorer tab in the toolbar and click on "Open folder". Select your repository and you can start working!

Frequently Asked Questions
FAQ1: How lucky am I?
You can run the uptime command to see how many users are using the current computer. The user count is incremented when someone logs in with an SSH shell or opens a terminal shell on the physical computer. Since some people might not use SSH Shells to log in remotely, the number might not always be incremented even if someone is using the machine. Then you will want to check the 1-minute, 5-minute, 15-minute average load of the machine and make your own decisions.
# Output format:
#  - The current time
#  - How long the system has been running
#  - How many users are currently logged on
#  - The system load averages for the past 1, 5, and 15 minutes.
uptime